Showing posts with label Software. Show all posts

Monday, 20 May 2013

How To Use Software’s After Trial Period is Over

Filled under:


Are you looking for a way to run trial softwares forever? There are some simple as well as tricky ways to make a trial software run after its trial period has been over.

Some use special softwares to monitor the installation process of the trial softwares (so that the complete modifications done by the software installation can be tracked) and later uninstall the software completely once trial is over while some would totally reinstall windows just for the sake of running that trial software again and again. There are some other good programs which can do some date alterations so that these trial programs could be run forever.
Time Stopper is a tiny utility which eliminate the time limit existing into trial software usage period. This tools support the usage of more than one trial software with it. You can configure the program to make a program to be run at a particular date. So, you don’t have to worry about altering the usual system time from the system tray. This trick might now always work with all the softwares.

How to Use Time Stopper Software To Run Trial Softwares

trial software time stopper How To Use Software’s After Trial Period is Over
Add caption

  1. After opening the time stopper program, Browse and locate the exe of the program to be done
  2. Now choose a date and time. Make sure you choose a date that is after the program installation and is before the expiration date of the program.
  3. Now click open software on the desired date.
You could also create a shortcut to run the software another time without the need of opening time stopper software again.
Download Time Stopper
Note :- This post is for educational purposes only. Do support the software manufacturers by purchasing the licensed softwares if you like them

Posted By Unknown22:07

Create Video Slideshows From Images By PhotoPixar

Filled under:


For those entire photo maniacs who have been long waiting for software to manage their photos with ease should now take a long deep breath as we have this latest update to share with them. Now there is a better way to view your photo collection than just scrolling them left and right on your screen. Well if you wish to make a personalized album with just a few mouse clicks then PhotoPixar is the answer.
PhotoPixar is a photo application that can be used to create photos album in seconds. It allows you to create albums in a video mode. The application has a simple user interface. You can create slideshows from photos in JPG, BMP and PNG format.
In order to run PhotoPixar, the specs required are Pentium 4 or above, 512 MB RAM, 20 MB Free space, Windows XP /Vista/ 7.
In order to create albums with PhotoPixar just follow these three easy step below:
Step 1: Import the images that you desire to be in your album. In order to import the images click the “Import Photos” button. You can also drag and drop the required photos onto the interface.
Photopixar SlideShow 560x399 Create Video Slideshows From Images By PhotoPixar
Step 2: To add required effects to images click Add Templates from the left side. You can choose from various effects for example leaves, bubbles, dragonflies, butterflies etc. The bar on the right side can be used to change backgrounds.
Enhance Photos in Photopixar 560x399 Create Video Slideshows From Images By PhotoPixar
Step 3: Now click Publish Album and click the Save button to finish the process.  Now if you wish to upload it on facebook click the facebook icon to share it. Or you can also click Upload to upload the album on PhotoPixar’s server.
Make Album In Photopixar 560x399 Create Video Slideshows From Images By PhotoPixar
That’s all. Now you can create photo albums in less than few minutes.

Posted By Unknown22:04

PC and Laptop for 10 Best Useful Softwares

Filled under:


Now a days almost every one using either computer or laptop. using this devices with simple softwares makes our work convenient  and  easy.keeping in this view we listed the best and commonly used softwares in day to day life.just go through the article below.i hope it will help you.

10 best softwares for pc you might already know:

1.notepad++:


Notepad++ is a free source code editor and Notepad replacement that  supports several languages.It can be used as notepad.
click here to get Notepad++

2.Tera copy:

The default progress bar Windows provides when copying files isn't enough  for a power user. TeraCopy gives you a better look at progress, and it  promises to speed up transfers over a network, skipping bad files and  resuming after you pause a transfer in progress.

3.Microsoft security essentials:

Microsoft securitty essentials is a free software and  Microsoft Security   Essentials might go down in    history as one of the best free software   released. This tool has given a number of antivirus vendors, especially  those who provide full-fledged free versions, a run for their money. It  can protect your PC from viruses, spyware and malware.

 4.speed bit video accelerator.

SpeedBit's Free Video Accelerator for YouTube is designed to work with your Web browser to improve    how it downloads and plays online video, especially high-quality formats streamed over broadband    connections. It buffers and smooths audio and video playback and reduces or eliminates freezing,  crashing, dropouts, and distortion. It's freeware, though a premium upgrade adds HD playback, iTunes  acceleration, and automatic setup.

 5. ISO Workshop – is a tool to extract, backup, convert & burn ISO files:

ISO Workshop is a free application designed to facilitate disc image management, conversion and burning    operations.It converts different disc images into the ISO FORMAT or bin format.

 6. Win To Flash:

  • easily put windows installation files from an optical disc to USB drive to make it bootable.


7.Skype:

Skype is easy to use.we can make free skype - to - skype calls and calls  to the phone at the skype rates.with all benefits of skype on your phone you can save your money and stay in touch when your on the move.

8. EASEUS Partition Master:

EASEUS partition manager is a nifty tool to create and manage disk partitions on Windows   systems. Even
if you created partitions during the setup process, and know how to use the disk   management console to create partitions,I’d recommend you download and keep this tool. That’s   because it offers some amazing features like resize, merge or split partitions,convert FAT to  NTFS, convert primary partition to logical and
vice versa,    and much more.

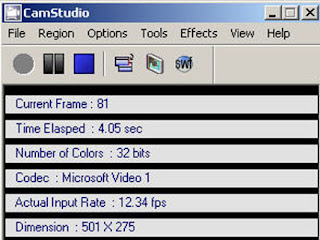
9.CamStudio:

CamStudio comes equipped with many options to tweak the way it records. There are options to   enable or
disable your mouse cursor, record sounds  from programs or a microphone (or have no sound   at all) and the option to  enable custom screen annotations.

10.Malwarebyte:free antimalware:

Malwarebytes powerful technology to detect and remove all traces of malware including worms,trojans, rootkits, rogues, dialers, spyware. Malwarebytes' primary feature is to scan your computer for the bad guys, and on that level it's  quite successful. It offers a quick scan, a full scan, and a flash scan to analyze memory and  autorun objects.

Posted By Unknown21:56

How to Play Any Video or Audio Format on Windows Media Player

Filled under:

Many people use Windows player to play audio and video files on their PC.It is the default media player in windows operating system and it is the best to play all  video and audio files.

Also Read : How to run Android Apps on PC

Here comes problem but some times we cant play some Audio and video formats using windows media player.so many people trying to get some other music players to play other formats.but it's not necessary to get different players we can play all video and audio formats on your windows player by using small tick...all you need is to get one simple software called  K-Lite Codec Pack.

Click Here to Get  K-Lite Codec Pack


Windows Media Player Supports following Files  Types:

  • AVCHD files (including Dolby Digital audio) - .m2ts and .m2t
  • Apple QuickTime files - .mov and .qt;
  • AVI files - .avi;
  • MPEG-4 movie files - .mp4, .mov, and .m4v;
  • MPEG-2 movie files -.mpeg, .mpg, .mpe, .m1v, .mp2, .mpv2, .mod, and .vob;
  • MPEG-1 movie files- .m1v;
  • Motion JPEG files- .avi and .mov.
  • Windows Recorded TV Show files - .wtv and .dvr-ms
  • Windows Media files- .wm, .wmv, and .asf

How to Play all formats on windows media player?

  • You can play it by using k-Lite Codec Pack
  • click here to Get K-Lite Codec Pack
  • Download and install the software on your computer.
  • that's it .now you can play any format on your windows Media Player.
Note: During installation click box windows media player to make it as default player to play all audio and video files.

Posted By Unknown21:52

Call recorder for Skype Video and Audio

Filled under:


FreeVideoCallRecorderforSkype_big[13]
W
ell now comes the security post on how you can record the calls made on skype, so it can be necessary if you just want to have some confidential talk and you want it to be recorded for future proof or anything.
So now a free video calls recorder by DVD Video Soft comes into play that can do both works all together or separately. So you can record video calls for the parties or you can go for one side recording depends on you, you can even go for only voice recordings.
Well now the best part is its simple user interface, so nothing is much complicated but you have simple option to record and even select the folder where you want to save all the data. Its CPU Usage consumption is even low as its just a small software.
Its creates .mp4 format for videos you save and .mp3 format for all the voice recordings. So its dam easy to be used just click on the record button and that starts your recording, you can even pause the recording if you do not want to record some moments.

Posted By Unknown21:22

How to Create Animated Gif Using Camtasia Studio

Filled under:


H
ave you ever seen moving pictures online and wondered how they are made?
Heres how to make a basic GIF picture with Camtasia Studio.
What Is Camtasia Studio?
Camtasia Studio is an advanced screen video recorder from TechSmith® which has edit, produce, and many more options to enhance your video, all in one program. One of the producing options in this program is GIF for a recorded video, which we will be learning about.
How To Start
Well first of all, download Camtasia Studio 7.0. There is a 30-day trial version that you can use but also i give out the full version registration code, so download one of these programs and install it on your PC. After you open Camtasia Studio, getting to know your interface would be helpful in the long road, but it’s not necessary.
1
Recording Your Video
Notice when you first open the program, a window pops up showing 4 options, one being “Record the Screen.” I have illustrated it here:
2
Or you can click on “Record the Screen” in the task list of the interface.
3
The next step is self-explanatory, you choose the area you want to record or you choose the whole screen, depends on what you want, then start recording after the 3-second countdown. Stop by pushing F10 or the “Stop” button
Producing It Into A GIF Animation
After you finish recording your video, a preview appears and in the corner there are 3 options:
Save and Edit, Delete, and Produce.
4
Click on Produce, save your video, and choose “Custom Production Settings” from the drop-down list and click “Next”.
5
Then comes the Output format screen, which has lots of formats, GIF being one of them, choose it:
6
Then click Next on all the following screens, as they are not necessary. You may edit some forms for modified animations but I won’t go there. (On the last form is the name of the video so you should change that.) After clicking Finish on the last screen, it will start converting.
7Now this will take some time depending on the length of the video (40 seconds is more than enough). Lagging occurs when the video exceeds 35-40 seconds.
And you are done! Your video is now gonna play in picture format, so you can send it to your cell-phone, upload it to your website in the format of a picture!
8
Drop your comments and questions below.. :)

Posted By Unknown21:20

How To Fix Blurred Photos / Images Free

Filled under:


One of the tedious task for image experts were, restoring blurred or out of focus images. Most people usually think that its impossible to fix blurred photos and wouldn’t bother fixing them. Infact there are tools and methods you could use to fix out of focus photos / blurry images.

We’ve listed out some of the software’s that’ll help you restore your blurred photos easily. Remember you cant get a true life recovery from a blurred photo, but these tools will definitely help you revive a good amount of detail from the blurred images.
These image de-blurring softwares make use of deconvolution algorithms to fix the defocussed or blurred photos and there are many algorithms to process the images based on the nature of blur it has been affected with.

1) SmartDeblur

SmartDeblur is a free software that can deblur photos / images based on various deconvolution algorithms. The image could be blurred either due to incorrect focusing by the camera, camera shake or due to the subject in motion.
SmartDeblur can fix the images based on the type of blur it has been affected with.
The interface is simple and minimal with options to select the defect type which includes ‘Out of Focus Blur’ , ‘Motion blur’ and ‘Gaussian Blur’. After choosing the right blur type of the image, proceed to the sliders and with a little play around with it (Radius, Smooth, Correction Strength and Edge Feather) you’ll get around a satisfactory image. The realtime  preview is shown below the settings.
Large sized images take longer to process and it depends on the system speed and performance too.
Moving on, the Settings tab will show you the constraint you could set for the image size manually and will be a value of 3000 by default and to its right will be shown the Deconvolution method to be used. Wiener and Tikhonov are the two methods which are based on different algorithms.
deblurring blurred image using smartdeblur How To Fix Blurred Photos / Images Free
Below is the Test image we’ve captured from our monitor, using an iPhone 4S. The purpose was to deblur the text in the image which was shown on a LED display. While capturing the image we purposefully brought the phone too close to the screen so as to get a blurred and unreadable image.
fixing blurred images with smartdeblur  How To Fix Blurred Photos / Images Free
After some tweaking and moving around with the sliders we’ve been able to deblur the photo to some extend and decrypt the letters. We use the default Wiener deconvolution algorithm to process the image which seemed better than the Tikhonov algorithm. The final image was passable though it got a bit of noise.
fixing blurred images with smartdeblur fixed image How To Fix Blurred Photos / Images Free
When the image gets affected by both Motion Blur and Out of focus blur, its gets tougher to get back the deblurred image.
Download SmartDeblur

2) Blurity (49$ Std & 99$ Pro )

Unlike SmartDeblur, blurity is not a free software and is costly. Blurity helps in removing simple motion blur and could unblur some of the out of focus photos too.
The above test image was put into blurity for a test and the results were not satisfactory as the above. But blurity did a better job with the images that had a motion blur which was one of the minuses of SmartBlur.
The Interface is simple and it provides you a basic mode and an advanced mode for debluring photos. After opening an image you need to select a portion of the image by clicking inside the image and then move on to the slider (basic or advanced) and then press Process to see the preview in the right pane next to the original opened image.
debluring using blurity How To Fix Blurred Photos / Images Free
As seen above, the free version of blurity watermarks your processed images with an UNREGISTERED text.
Blurity did a better job with the above image and the final results were pretty impressive. The above image was blurred using a synthetic camera motion.
Download Blurity

3) Unshake (Free)

Unshake is free and doesn’t require an installation. Being a java based program, its runs on Windows, Linux and Mac OS X and requires the Java Run time environment preinstalled on your pc.
The interface is simple and like the above mentions softwares, it does require some experimentation to achieve better results.
unshake interface How To Fix Blurred Photos / Images Free
You may adjust the slider to suit the amplification you need for the photo. Too much amplification might ruin the image and more noise would be added. Unshake could also work on lines found on pictures in magazines and also for rasters and dithering.
Below is a blurred photo that has been processed using unshake.
restoring blurred image with unshake How To Fix Blurred Photos / Images Free
Unlike the above two softwares, unshake takes a lot of time to process a photo with increase in size of the images. So, its better to experiment with cut down sizes of the photo before loading it with a large Megabyte sized file.
It won’t give you unbelievable results on fixing blurred photos especially when the subject is a fast moving one (too much blurred). But its always good to give Unshake a try, in improving a photo that couldn’t be replaced. It might turn useful in some cases where you might need to restore that awesome moment back to life!
Download Unshake

Posted By Unknown11:59

Cleanup Unwanted Toolbars from Chrome & Firefox

Filled under:


Some of the Freewares that you download & install from the internet comes bundled with toolbars which may be from their sponsors or for their monetary benefits. While most softwares prompts you before  installing those toolbars, some might confuse their installation with ill-defined options and get installed without your prime permission. 
When some toolbars  might be useful, most people doesn’t prefer using toolbars and it would certainly reduce the browser work space too. Infact, unnecessary tool bars are one of the top reasons for slowing down the browsers and your system. Some toolbars even install extensions and change the settings inside chrome and firefox like changing the home page, installing bho’s and so on.
Most toolbars might give you the option to uninstall them via add or remove programs but, this might not be the same in all cases. If you don’t want to jump into these hassles in removing them, then Toolbar Cleaner would probably be the right choice for you.
This nifty utility lets you remove toolbars and BHO (Browser Helper Objects) from Google Chrome, Mozilla Firefox and Internet Explorer.
After installing and running Toolbar Cleaner, it automatically detects the browsers with the connected toolbars and BHO’s which are installed in your system.
toolbar cleaner for chrome firefox Cleanup Unwanted Toolbars from Chrome & Firefox
Before the final step of its installation process, Toolbar Cleaner marks the options to install a anti phishing toolbar and chafes you to set its website as your browser homepage.
The main interface in clean without too many options to bother. Under the main Browser Tab of the Toolbar Cleaner window, you’ll see the list of unwanted toolbars being listed out.
As there are no toolbars installed inside the browsers, (image below) its shown as Nothing was found under Firefox and Chrome but could see the IDM integration Browser Helper Object being listed out under Internet Explorer. As its a useful addon for downloading files from internet, there wasn’t any need for removing any thing in particular from the browsers.
toolbar cleaner main window Cleanup Unwanted Toolbars from Chrome & Firefox
If you see any unwanted toolbars and bho’s being listed out, select and click on Remove Selected Toolbar(s)/BHO(s). A dialog box would popup succeeding the removal, asking you whether to open Control Panel to remove any related items.
toolbar cleaner windows 8 Cleanup Unwanted Toolbars from Chrome & Firefox
The next tab shows you the list of items that gets started while you login to windows. To speed up windows startup, You may remove any items that runs during the windows logon process, if the item is of no use to you.
toolbar cleaner popup details Cleanup Unwanted Toolbars from Chrome & Firefox
Hovering your mouse over any item in the list would show you an blue icon to the left of it. Moving your mouse over the icon would popup a window with the item details that includes the location of the application and related information.
Control panel option toolbar cleaner Cleanup Unwanted Toolbars from Chrome & Firefox
The Options menu provides a way to get into the Programs and Features  menu inside Control Panel directly. This may be useful if you want to remove any particular application related to the tool bar being listed. It just got the language selection, a link to their home page and message notifications options.

Conclusion

Toolbar Cleaner works in Windows 8, 7 & Windows XP and does it job neatly in cleaning up all the nettlesome toolbars and browser helper objects from your browsers.
Download Toolbar Cleaner

Posted By Unknown11:55
Related Posts Plugin for WordPress, Blogger...